


If You’ve Ever Wanted to Learn Coding, Start Here with Me, A Beginner’s Guide by a Beginner 01
I’m learning to code from scratch, and I’ll be showing you everything I discover along the way. Simple, honest, and beginner-friendly.

Before the First Line of Code: Guide to Getting Your Computer Ready to Code in 2025 and Beyond.
Tools Needed- Figma, VS code
How to Set Up Figma
Figma- Go to Figma.com , click on “Get started for free”

Click on “Continue with Google” or “Input your email address, click on “Continue with Email” then follow the process after.

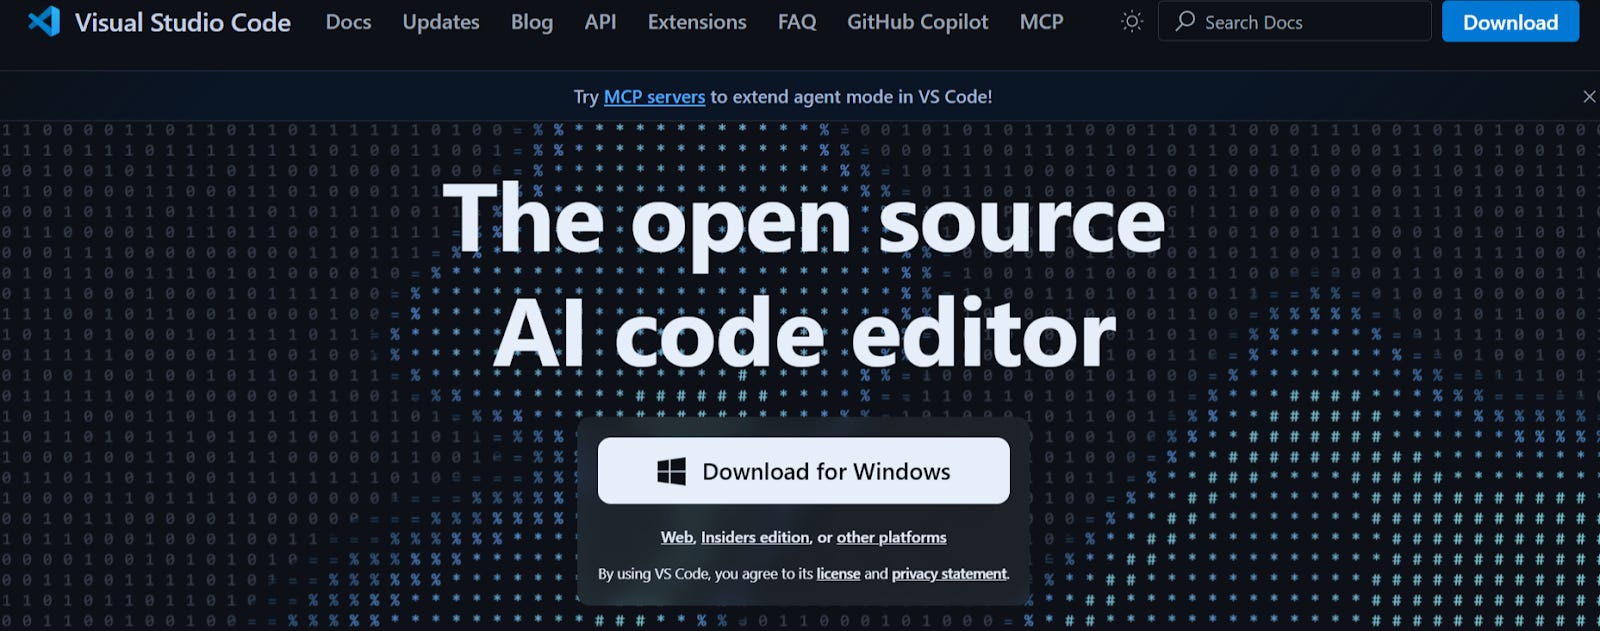
How to Set Up VS code
Go to
https://code.visualstudio.com/
, click “Download for Windows” for Windows users or “Download”
If you clicked “Download” you will further see different specifications for different computer types. Click on your computer type and in a few seconds, it starts to download.

When it downloads, open the folder in your computer, double click to install, keep clicking, “yes”, “accept”, “I agree”, “next” “finish” as you see them. Then your VS code should download successfully.
Further VS Code Set Up - Install Extensions
We will be installing several extensions, extensions are created to help us code better.
Install Liver Server by Ritwick Dey
Click to open the downloaded VS code, in the left side bar, you will see some icons, hover on them, check for the icon that says “Extension” then click it.
When you click it, you will see a search bar, type “Live Server” and click enter.
This shows you a list of different Liver Server extensions. Click the one that has the name “Ritwick Dey”, you will see the details page that explains the use of this extension, then click the “Install” button. It then installs in a few seconds, you can confirm that it has successfully installed when the install button changes to “Disable”.
Install Auto Rename Tag by Jun Han
In the same search bar, type “Auto rename tag”, and click enter.
This shows you a list of different auto rename tag extensions. Click the one that has the name “Jun Han”, you will see the details page that explains the use of this extension, then click the “Install” button. It then installs in a few seconds, you can confirm that it has successfully installed when the install button changes to “Disable”.
Install Prettier by Prettier
In the same search bar, type “Prettier”, and click enter.
This shows you a list of different prettier extensions. Click the one that has the name “Prettier”, you will see the details page that explains the use of this extension, then click the “Install” button. It then installs in a few seconds, you can confirm that it has successfully installed when the install button changes to “Disable”.
The Prettier extension requires some settings, in the left side bar again, hover on all the icons, click the one that says “ Settings”, the icon is usually at the bottom of the left side bar.
When you open Settings, you will see a search bar at the top and search “ Format” , you will see different Format options.
Check for the one that says “Editor- Format on save”, you will see a checkbox, if yours is not checked, please check it.
In the same list of Format, Check for the one that says “Editor- Default formatter”. Click on the drop down, and select “Prettier - Code formatter” . Now you have successfully set up Prettier has your default code formatter.
Install Tailwind CSS Intellisense by Tailwind Labs
In the same search bar, type “Tailwind css intellisense”, and click enter.
This shows you a list of different tailwind css extensions. Click the one that has the name “Tailwind Labs”, you will see the details page that explains the use of this extension, then click the “Install” button. It then installs in a few seconds, you can confirm that it has successfully installed when the install button changes to “Disable”.
Install Tailwind Fold by Stivo
In the same search bar, type “Tailwind fold”, and click enter.
This shows you a list of different tailwind fold extensions. Click the one that has the name “Stivo”, you will see the details page that explains the use of this extension, then click the “Install” button. It then installs in a few seconds, you can confirm that it has successfully installed when the install button changes to “Disable”.
Install Import Cost by Wix
In the same search bar, type “Import cost”, and click enter.
This shows you a list of different import cost extensions. Click the one that has the name “Wix”, you will see the details page that explains the use of this extension, then click the “Install” button. It then installs in a few seconds, you can confirm that it has successfully installed when the install button changes to “Disable”.
Install Quokka.js by Wallaby.js
In the same search bar, type “Quokka.js”, and click enter.
This shows you a list of different import cost extensions. Click the one that has the name “Wallaby.js”, you will see the details page that explains the use of this extension, then click the “Install” button. It then installs in a few seconds, you can confirm that it has successfully installed when the install button changes to “Disable”.
Install Prompt Boost by Chris Dias
In the same search bar, type “Prompt boost”, and click enter.
This shows you a list of different import cost extensions. Click the one that has the name “Chris Dias”, you will see the details page that explains the use of this extension, then click the “Install” button. It then installs in a few seconds, you can confirm that it has successfully installed when the install button changes to “Disable”.
Download Node.js
Go to https://nodejs.org/en/download , just like you download VS code based on computer type, you will also find download options based on your pc (Whether Windows or Mac).
Make sure the version that says ( LTS ) is the one selected for download
After downloading, install it the same way you installed VS code on your computer.